I'm slowly redoing my house, one room at a time. The first floor was done by professionals, but the second floor required finances above my budget, so I decided to do it myself. Thankfully no construction was needed. I had crown molding added, but everything else is cosmetic. This is how my son and I converted my office.
The walls were a muted peach. I think the former owners found a sale on peach paint and painted everything that color: the walls, woodwork, ceiling. We redid everything.
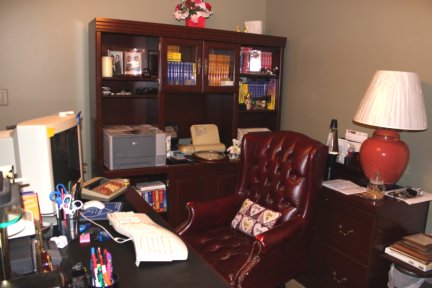
The room is not usually this junky, but as I moved from room to room, I kept storing things in the next room. All the junk that was not thrown out or donated to a good cause has been room to the next room.
The book case below is something I bought right out of college. It's
put together with shelves and columns. It's still sturdy, but I
removed it from the room and replaced it one that matched the other
furniture.
Before I began this project, I watched a lot of YouTube videos and episodes of DIY. I decided to paint the walls exactly as they advised, following all the recommendations. The results were fantastic.
First, we removed as much of the furniture as we could.
The desk and credenza stayed in the room. We couldn't moved them. The credenza was built in the room, so I never tried to get it through the door. Plus its weight prevented me from moving it. We wrapped what we couldn't move in plastic. I used the plastic drop cloths because they are huge and covered tall and awkwardly shaped things. To cover the floor, I used the burlap drop cloths. First, they are environmentally friendly and second they are thick enough to prevent paint from seeping through if its dropped. When you walk they don't move like the plastic does.
I
removed the fan blades and did some needed repair to the ceiling. I'd
previously had a handy man refit my fan in the ceiling and he did a poor
job.
I went to Home Depot and Lowes and found the right product to repair the ceiling. Anything you need to know about repairing something, the technicians at the stores can tells you. Often I find a professional in the aisles who will always help me, even draw pictures if needed. Now I take pictures and go to the store with them.
I also feel safer sitting under it, knowing that it's secure and won't come crashing down.
As every professional will tell you, preparation and equipment are key to the success of any project. From the first room I tackled (the smallest bedroom), I bought Benjamin Moore paint, good paint brushes and rollers, painter's tape,a 5-in-1 tool, KILZ-2 Latex primer and paint trays. I also got a good ladder. I bought one of the Little Giant brands they advertise that can be set in many different positions. I wanted to be able to use it in the scaffolding position so I wouldn't have to continue to go up and down. I never did it. The ladder is so sturdy, I could lean and reach greater distances than I expected.
This was a trick my nephew taught me when we hung my chandelier in the dining room and there was a lot of dust around. I covered the fan housing and taped it to keep out unnecessary dust. After everything settled I'd have less cleanup.
Preparation is 90% of the job. We used lots of tape, waiting in between for the drying process to finish. After painting, we waited an hour or two and pulled the tape off. Do it will the wall is still wet, so it doesn't pull the paint off with it.
The color I chose was sage and this is a fair representation of the final product.
I love the painting process. You get instant gratification at so many levels. If the plan for the day was to paint the ceiling. When it's done, you feel great. You smile and think
the ceiling is done. The next day, you can go on to another section. I would look at the walls and decide if my plan was to finish one wall or two walls or the woodwork in the room. Often it would be only a section of the woodwork, like the doors (closet doors and room door). It could be the windows. Every room has either double windows or two separate windows. Two rooms have one Anderson window, so I didn't have to paint the woodwork, but I did have to do the frames. Most of the frames were raw wood, so we both primed and painted. And the instant gratification was at a high.
Not only was the painting done, but the contrast with the wall color made it pop!
At this point we decided to rearrange the furniture to give me more walk-around space. The desk was moved forward and all the stuff along the facing wall was cleared away.
We moved the bookcase back, but decided to get one that matched the other furniture pieces in the room.
I put the bookcase together. The package said it would take two hours. I did it in two hours. I still long for the days when furniture came assembled. But, again I had the gratification of saying,
I did it.
After the paint dried and the tape was pulled, we started putting the furniture back.
I bought new curtains to complement the wall color and my son even said he liked them.